Microsoft XNA Game Studio 3.1 was released today and as a result I had to get my hands dirty with the avatars. I've been waiting on this since August of last year when I heard about NXE and went to GameFest where I saw how the native Xbox developers could make calls to render the user's Avatar.
I've followed Dean Johnson's blog where he has written a few entries about the avatar system. I was really looking forward to it. Things at my day job have been pretty hectic recently and I've been putting in some late hours - reminds of when I was writing the book - so if this tutorial isn't up to snuff, I'll come back and edit it. But for now, I wanted to get the information out there for people to be able to start playing with this cool feature.
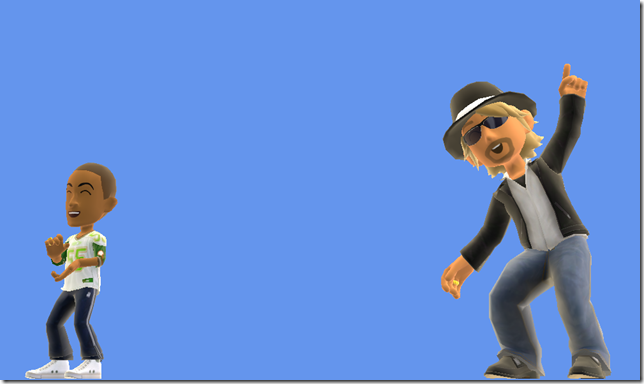
The end result of what we will be building is a quick demo that allows the user to generate a random avatar and cycle through pre-built animations of our own avatar.
Let's get started!
This tutorial is going to assume you know how to draw 3D objects and use a camera. I won't be discussing those items here. This is purely to get going with displaying the 3D avatars. I used code from chapter 6 in my books as a starting point. It has it's own camera and input classes. The 2.0 code for that chapter is available on my downloads page.
We need to declare the following member fields that will store our randomly generated avatar data:
AvatarDescription avatarDescription;
AvatarRenderer avatarRenderer;
AvatarAnimation avatarAnimation;
Next, we can add in the member fields that will store our own avatar's data:
AvatarRenderer personalAvatarRenderer;
AvatarAnimation personalAvatarAnimation;
We can also store the current animation of our personal avatar:
AvatarAnimationPreset currentAnimation = (AvatarAnimationPreset)0;
We just set the default animation to the first one in the AvatarAnimationPreset enum.
Then inside of the constructor we set the backbuffer width and height. I set it to 1920 x 1080 since that is the display connected to my Xbox 360.
graphics.PreferredBackBufferHeight = 1080;
graphics.PreferredBackBufferWidth = 1920;

graphics.ApplyChanges();
I then added my own FirstPersonCamera and InputHandler game components (feel free to use your own):
input = new InputHandler(this, true);
Components.Add(input);
camera = new FirstPersonCamera(this);
Components.Add(camera);
It is very important to include the GamerServicesComponent so we can obtain the avatar information:
Components.Add(new GamerServicesComponent(this));
In the LoadContent method we can add the following:
avatarDescription = AvatarDescription.CreateRandom();
avatarRenderer = new AvatarRenderer(avatarDescription);
avatarAnimation = new AvatarAnimation(AvatarAnimationPreset.Clap);

font = Content.Load<SpriteFont>(@"Fonts\Arial");
We are obtaining the description of the avatar by calling the CreateRandom method. We then take the description and apply it to the actual renderer. Finally we initialize an animation that we will use later. (We also are going to display the name of the animation our personal avatar will be doing so we added the font.)
Now we can add the following logic to our Update method (You can substitute your own input handler code):
PlayerIndex playerIndex;

if (input.WasPressed(null, Buttons.A, Keys.Space, out playerIndex))
{
    avatarDescription = AvatarDescription.CreateRandom();
    avatarRenderer = new AvatarRenderer(avatarDescription);
}

if (input.WasPressed(null, Buttons.B, Keys.B, out playerIndex))
{
    currentAnimation++;
    if (currentAnimation >= AvatarAnimationPreset.MaleYawn)
        currentAnimation = (AvatarAnimationPreset)0;

    if (personalAvatarAnimation != null)
        personalAvatarAnimation = new AvatarAnimation(currentAnimation);
}

avatarAnimation.Update(gameTime.ElapsedGameTime, true);

if (personalAvatarRenderer == null)
{
    foreach (SignedInGamer gamer in SignedInGamer.SignedInGamers)
    {
        personalAvatarRenderer = new AvatarRenderer(gamer.Avatar);
        break;
    }

    personalAvatarAnimation = new AvatarAnimation(currentAnimation);
}

personalAvatarAnimation.Update(gameTime.ElapsedGameTime, true);
We check to see if the user pressed the A button. If so, we generate a brand new random avatar. If they press B then we increment the currentAnimation value, reseting to zero if we get to the end of the enum values. The .NET Compact Framework on the Xbox 360 doesn't support Enum.GetValues so we will simply convert to an integer to iterate through them. We then change the animation playing in our personal avatar to our new value.
We then call update on the random avatar, passing in the elaspsed time and true which means we want to loop this animation.
If the personal avatar hasn't been created yet, then we grab the first signed in gamer (this could definitely be more robust) and pass in the gamer's Avatar description to the AvatarRenderer. We also initialize the animation for the personal avatar. Finally we call update on the personal avatar also telling it to loop.
All of this is fine, but we haven't actually drawn anything to the screen. We can correct that now by adding the following code to the Draw method:
avatarRenderer.World = Matrix.CreateRotationY(MathHelper.ToRadians(180.0f)) * Matrix.CreateScale(10);
avatarRenderer.Projection = camera.Projection;
avatarRenderer.View = camera.View;

avatarRenderer.Draw(avatarAnimation.BoneTransforms, avatarAnimation.Expression);


if (personalAvatarRenderer != null)
{
    personalAvatarRenderer.World = Matrix.CreateRotationY(MathHelper.ToRadians(180.0f)) *
        Matrix.CreateTranslation(new Vector3(3, 0, 0)) * Matrix.CreateScale(10);
    personalAvatarRenderer.Projection = camera.Projection;
    personalAvatarRenderer.View = camera.View;

    personalAvatarRenderer.Draw(personalAvatarAnimation.BoneTransforms,
        personalAvatarAnimation.Expression);
}

spriteBatch.Begin();
spriteBatch.DrawString(font, currentAnimation.ToString(), new Vector2(20, 20), Color.Black);
spriteBatch.DrawString(font, currentAnimation.ToString(), new Vector2(21, 21), Color.Yellow);
spriteBatch.End();
We set the World, View and Projection matrices on the avatars. Based on my camera and world settings, I scaled the avatar by 10 units. We then actually call the Draw command passing in the bone transforms and the avatar expression so it knows how to draw the avatar.
We finish up by drawing the current animation to the top left of the screen.
The XNA Framework team did a fantastic job of providing avatar functionality that is extremely easy use. They also exposed ways to work with data at a more lower level. I hope to see some really awesome avatar games!

Happy Coding!
-Chad