This tutorial will describe the process where you create a selection wheel to be used with a Gamepad controller. This will allow you to create conversation wheels, power wheels, weapon wheels, command wheels, etc in your games.
Note this demo requires a Gamepad, so you will either need to have one hooked up to Windows or run this on the Xbox 360 (which requires an AppHub membership).
Games such as Mass Effect, Assassins Creed and Dragon Age all use selection wheels. I thought it was extremely clever the first time I saw it used in a game and I definitely enjoy games that utilize it.
Here is an example of a selection wheel inside of BioWare’s Dragon Age: Origins:
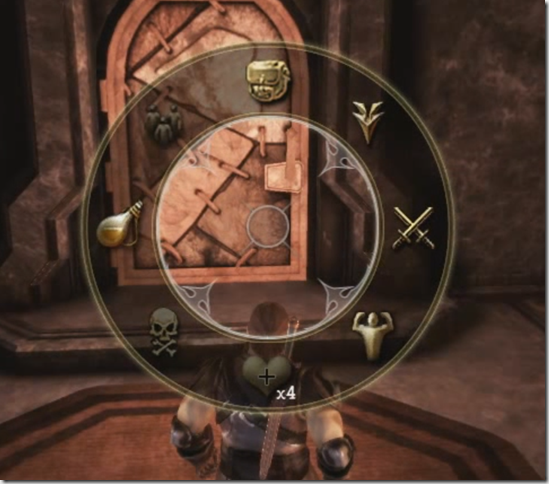
The wheel is populated with all of the valid choices but items that can’t be selected are dimmed. From this wheel the player can select items which can either select that item or bring up new selections in the wheel. For example, if the user selected the health item at the bottom (assuming it was enabled because the character was in combat) then it would immediately apply the health potion to the character and the wheel would disappear. However, if the user selected the Potions selection on the left the items in the wheel would be replaced by the available potions the user had. For Dragon Age, the gamer brings up this wheel by holding down the Left Trigger.
Here is an example of a command wheel in BioWare’s Mass Effect:
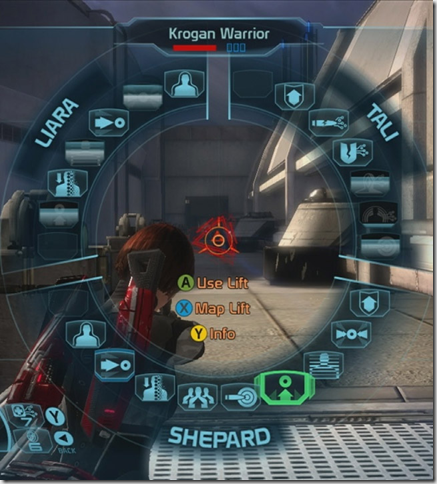
This is a wheel that has a lot more options but the premise is the same. Move the Gamepad controller around the edges to select the item. In this case there is no “drill down” option and any selection is a final selection and the wheel closes. The gamer brings up this wheel by hitting the Right Bumper (RB) button.
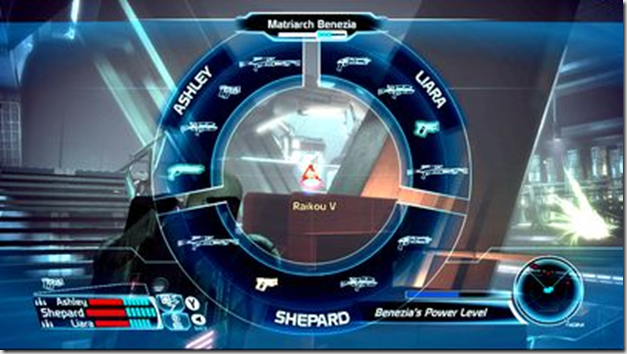
If the user presses the Left Bumper (LB) button then Mass Effect’s weapon wheel is brought up:
Another example is one from Ubisoft’s Assassin’s Creed. The example I’m showing here is from Assassin’s Creed 2:
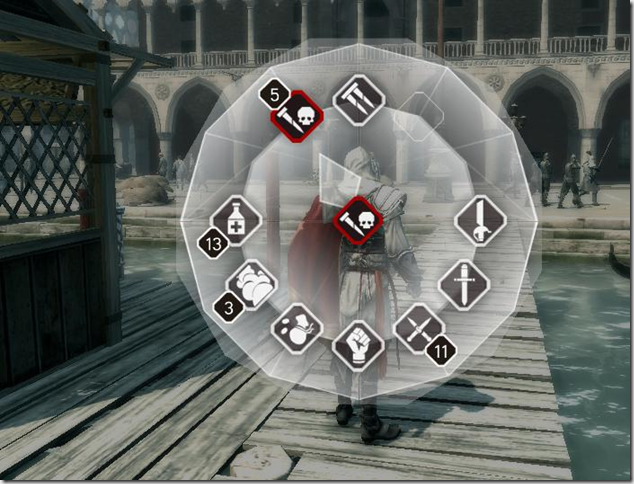
When an item isn’t available, they just hide that item from the wheel altogether (instead of showing a disabled icon). This also simply selects what is desired and closes the wheel.
The final examples I will show are the conversation wheels from BioWare’s Dragon Age 2 and Mass Effect:

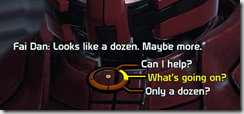
In these images only three items on the right are available. When more conversation items are available they will show up on the left. The point here is that you can utilize the same input mechanics in a wide variety of games. I’ll attempt to explain how you can do so.
Let’s get to it already!
The example code I’ll be showing today doesn’t take into consideration any selection / disabled / non-visible items but it would be pretty easy to add that in. Instead it focuses on the code to map the Left Thumb Stick’s X and Y coordinates to the selection wheel. It will show how to convert the X and Y values from the thumbstick to an angle and then utilize that angle to point to the different items in our wheel. The current item that is pointed to will be displayed beside the wheel.
To start out I create the actual wheel in Paint.NET.
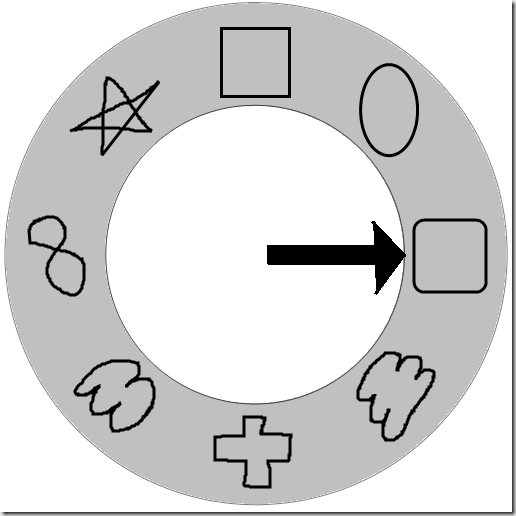
And this is why I am a software engineer and not a graphic designer.
The download at the bottom includes the actual wheel.pdn (Paint .NET file) with the different layers. The actual content project will use two different files created from this original artwork. The first is the selection wheel itself (selection.png). The second is the arrow (selector.png).
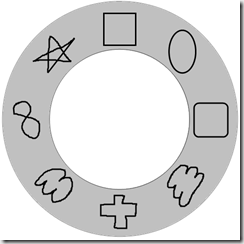
Note for the blog, these have white backgrounds but in the download they are transparent. So make sure you grab the files from there and not by saving these images.
After creating the artwork I then started on the code (which was much easier I must say). A real artist would have had no problem lining up the inner circle to the outer circle but I struggled and still am not confident it is perfectly centered. Ah to really know the tools you use is beneficial and I don’t know any image editing software very well.
So create a new Windows or Xbox 360 Game project in Visual Studio. I called mine SelectionWheel. Inside of the Content Project (i.e. SelectionWheelContent) add the artwork selection.png and selector.png. Also add in a new SpriteFont called font. (Right click on SelectionWheelContent and select Add New Item then select Sprite Font from the list. and change the name from spritefont1 to font)
Open up the font xml file (font.spritefont) and change the size to 32. That is all of the content we need for this tutorial.
Now open up the Game1.cs file and add the following member fields to the class:
Texture2D selection;
Texture2D selector;
SpriteFont font;
Now we are going to add the integer values we will be selecting on the wheel. Add the following constants to the class:
const int ROUNDED = 0; //start with the selection on the right first
const int ELIPSE = 1; //work your way counter-clockwise
const int SQUARE = 2;
const int STAR = 3;
const int INFINITY = 4;
const int ABSTRACT = 5;
const int PLUS = 6;
const int CLOUD = 7;
We could modify this to have more items on the wheel. Currently this is only 8 items for the main 8 directions of the thumbstick but we could add several more items and modify the math we will see a little later to accommodate the additional items. Notice how we start numbering them with the item on the right first. The math involved starts with angle value of 0 on right. As you move counter-clockwise (moving up and to the left the radians / angle increases). We will talk more about this a little later.
Next we need to create a member field to store the list of selections. In this case we are just storing strings of the selection, but this could be any kind of object you desire. We will also add in a variable to store our radians and index of our selection.
Dictionary<int, string> selections = new Dictionary<int, string>();
float radians = 0;
int index;
Let’s initialize those selections by adding a new method InitializeSelections that we will call from the Initialize method in the game class:
void InitializeSelections()
{
    selections = new Dictionary<int, string>();
    selections.Add(ROUNDED, "ROUNDED");
    selections.Add(ELIPSE, "ELIPSE");
    selections.Add(SQUARE, "SQUARE");
    selections.Add(STAR, "STAR");
    selections.Add(INFINITY, "INFINITY");
    selections.Add(ABSTRACT, "ABSTRACT");
    selections.Add(PLUS, "PLUS");
    selections.Add(CLOUD, "CLOUD");

    index = 0; // default to selecting the value on the right (ROUNDED)
}
Inside of our Game1 constructor we can set the preferred backbuffer width and height if we want. My setup supports 1920x1080 so that is what I’m setting. The XNA Framework will select the highest resolution supported by the output device if the resolution asked for isn’t supported.
//Will be scaled down if not supported
graphics.PreferredBackBufferWidth = 1920;
graphics.PreferredBackBufferHeight = 1080;

graphics.ApplyChanges();
Next we can actually load the content we created by adding the following code in the LoadContent method:
selection = Content.Load<Texture2D>("selection");
selector = Content.Load<Texture2D>("selector");

font = Content.Load<SpriteFont>("font");
We will save the Update method for the last since that is where the bulk of our work will be done. For now, let’s add the following code to our Draw method which will draw the actual selection wheel,
spriteBatch.Begin();
spriteBatch.DrawString(font, selections[index], new Vector2(530, 0), Color.Red);
spriteBatch.Draw(selection, new Rectangle(0, 0, 512, 512), Color.White);
spriteBatch.Draw(selector, new Rectangle(256, 256, 512, 512), null, Color.White,
                        -radians, new Vector2(256,256), SpriteEffects.None, 0);
spriteBatch.End();
The selection is being drawn based on the current index selected (initialized to 0). The selection wheel is drawn and the selector is drawn right on top of it. The selector is being rotated by the negative radians amount. The radians value will be populated in the Update method next. It is being drawn offset so it will be in the center of the selection wheel and the origin of the selector was set to half of the texture size (256,256) so it would rotate around the middle. The selector image could be trimmed and these values modified to save some room but for this example I wanted to keep it clear as to how it is working.
Now we get to the real part of the tutorial. Here comes the big complicated math to make this work. It really isn’t complicated or I wouldn’t be able to do it – so don’t worry!
Inside of the Update method let’s grab the state of our Gamepad:
GamePadState gp = GamePad.GetState(PlayerIndex.One);

// Allows the game to exit
if (gp.Buttons.Back == ButtonState.Pressed || Keyboard.GetState().IsKeyDown(Keys.Escape))
    this.Exit();
The above code should replace the existing GamePad.GetState condition in the Update method.
Next we need to calculate the index we are currently pointing to so the arrow. In order to determine the index we first need to convert our Thumbstick’s X and Y values (which go from -1.0 to 1.0) to an angle value in radians. Let’s start off calculating the radian value and then work our way up to determining the index.
//Get radians from thumbstick
if (gp.ThumbSticks.Left.Y != 0 || gp.ThumbSticks.Left.X != 0)
    radians = (float)(Math.Atan2(gp.ThumbSticks.Left.Y, gp.ThumbSticks.Left.X));
First, we only want to change our radians value if the thumstick is off center. If it is centered, but the X and Y values will return 0. Assuming the stick is actually being pushed in a particular direction we want to determine the angle. The MathHelper.Atan2 method is extremely helpful. This is why I love the XNA Framework. There is no need to write code for the trigonometry behind this calculation we can simply use it. A good explanation of the Atan2 function can be found in the AppHub’s educational catalog. The Aiming example has a TurnToFace method which actually includes a diagram in source code :) The help for the Atan2 method is also helpful: http://msdn.microsoft.com/en-us/library/system.math.atan2.aspx
At this point we have our angle value (in radians). You can totally just work with radians but most people (myself included) find it easier to work in degrees. As a bonus, I’ll show how to work with radians at the end. For now, to get the angle in degrees we need to add the following code to our Update method:
//convert to angle from radians to degrees
float degrees = radians * 180.0f / (float)Math.PI;

//changes -90 to 270
if (degrees < 0) //Atan2 returns negative for quadrant 3 and 4
    degrees += 360; //so make it positive by adding 360 to it (get values 270-360);
To convert from radians to degrees we only need to multiply the radians value by 180 and then divide that by Pi (~3.14). Atan2 returns negative values for quadrant 3 and 4. So basically 181-359 degrees comes out as -180 to -1. (Atan2 returns values from -Pi to Pi to give you a full circle basically -180 to 0 to 180 instead of 0 to 360).
We check to see if our degrees value is less than 0 and if so we add 360 to it. This converts -179.99 to 180.01 and -90 to 270 and -0.01 to 359.99. So we get a full 0 to 359.999 degrees in our circle.
Now that we have a value in degrees we need to convert that to an index so we can determine which value in our list of selections is actually selected. The selection item is simply a string but it could be desired to store another type of object complete with its own properties and methods. This object could contain a flag as to if it was enabled and/or visible. It could contain an image that would be displayed on the wheel instead of a static wheel like we currently have. For now, we are keeping the tutorial simple and are just storing a string value.
Assuming our indices match up to our selections we can add the following code to our Update method:
index = (int)((degrees + 22.5f) / 45);
So there are two things happening here. The first is we are dividing by 45 degrees. This is because we have 8 items in our wheel. 8 goes into 360 45 times. So each item takes up 45 degrees of the wheel. This is all we would need if the selection of the first item (on the right) started at position 0. However, position 0 is right in the middle of the first selection (ROUNDED in our case). So in order to offset our angle we are adding an offset of 22.5 degrees before dividing by our 45 degrees. 22.5 is half of 45. Since 0 splits the ROUNDED item in half, we want half.
We could make this a little more dynamic if we wanted to. Let’s say we had 12 items in our list instead of 8. Assuming we added the constants and the new strings to our list and updated our image as well we could have the following code:
float itemDegree = 360.0f/selections.Count;
float offset = itemDegree / 2.0f;
index = (int)((degrees + offset) / itemDegree);
So we determine how many degrees an item takes up (itemDegree) by dividing 360 by the number of selections we have (8, 12, etc). We then determine the offset (assuming we always start with index 0 is on the right) by dividing the number of degrees and item takes up (itemDegree) in half. We then plug in the itemDegree and offset into the same formula above where we hard coded the values. So this would be beneficial if you are reusing the selection wheel in your code for let’s say a weapon wheel and a conversation wheel. You could pass in your weapons values or your conversations values and the code will figure out which index should be selected.
There is one more thing we need to do to determine our index. Since we added that offset value to our index we can get an invalid index value of 8 once we hit 337.5 (360-22.5) degrees or higher. So we need to roll over our index back to 0 since we are on the bottom part of our first selection item (ROUNDED). Add this to the Update method:
if (index == selections.Count)
    index = 0; //since we are adding in 22.5, we will go over, so reset it
Should you not like using a condition you can do a bit AND to accomplish the same task. It is a little less readable but it isn’t too bad:
index = (int)((degrees + 22.5f) / 45) & (selections.Count -1 );
This does a bit AND of 7 (we have 8 selections) so this will return 0 to 7 which is what we are after.
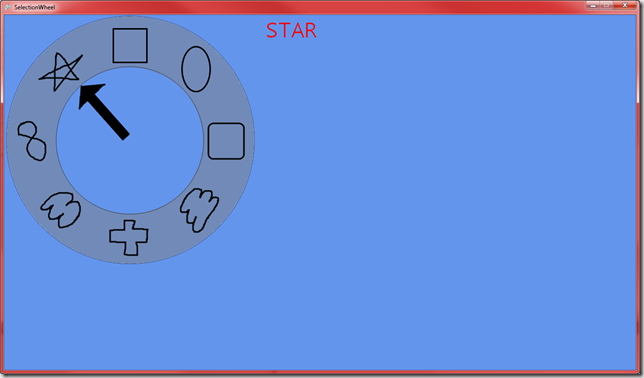
When you run the game you should be able to select any point on the wheel with the gamepad and have the text update as you move the thumbstick.
Degrees are for wimps, I only use Radians!
If for some reason you enjoy working with radians and converting to degrees seems wrong to you then you could use the following:
index2 = (int)((radians + MathHelper.TwoPi + (0.3926990816987241f)) / MathHelper.PiOver4)
                                                                & (selections.Count - 1);
I just used the same formula we used for degrees but instead of adding 360 I added TwoPi. This is ok since at the end I bit AND the value by my selection count - 1. So it handles overflows just fine. MathHelper.PiOver4 (Pi/4) is 45 degrees. The obnoxious number of ~0.392 is the offset of PiOver4 / 2.
By the way, if converting radians to degrees is wrong, then I don’t want to be right. This is one of those micro optimizations that most likely isn’t worth it and you shouldn’t sacrifice readability unless you have an extreme situation.
Wrap Up
So grab the code and toy around with it. Some things to try:
- Embed this code inside a condition that checks if the Left Trigger or Left Bumper being pressed.
- Add in the actual selection code of what happens when the user presses A.
- Use actual objects and add an Enabled flag to determine if you want the user to be able to select that value. Either keep the arrow from moving to those locations and hide the selections or just dim them and don’t let the user select them.
- Have fun with it!
Download the Source Code and Assets
Happy Coding!
-Chad